How to Plan a Livestream Event for Newbies: Streamyard Edition

NEW RED.png
Streamyard DZL.png

Not an expert in livestreaming? Don't worry, we've got you covered. StreamYard is a livestreaming platform perfect for individuals or businesses that need the basics for online events - it makes the process easy and straightforward. Not sure where to begin? Check out these tips.

NEW RED.png

1. CREATE AN ACCOUNT

First things first, make sure to create an account on streamyard.com using an email that you and those appointed to be on the streams' backend can access.

2. CHOOSE A DESTINATION

A destination is where your broadcast will occur; some examples are Facebook, YouTube, Twitch, and LinkedIn. In DZL’s case, we used the Facebook page of our client. With that said, during your onboarding and prep, make sure you obtain access to your client’s socials so you can add and connect.

 
SY 2.png
SY 1.png
 

3. CREATE A BROADCAST STUDIO

Your broadcast studio is where all the magic happens. When you click “create,” you can now choose the destination(s) you would like to stream to. If this is done correctly, you will be able to enter with no issues!

 
Create+A+Broadcast.jpg
 

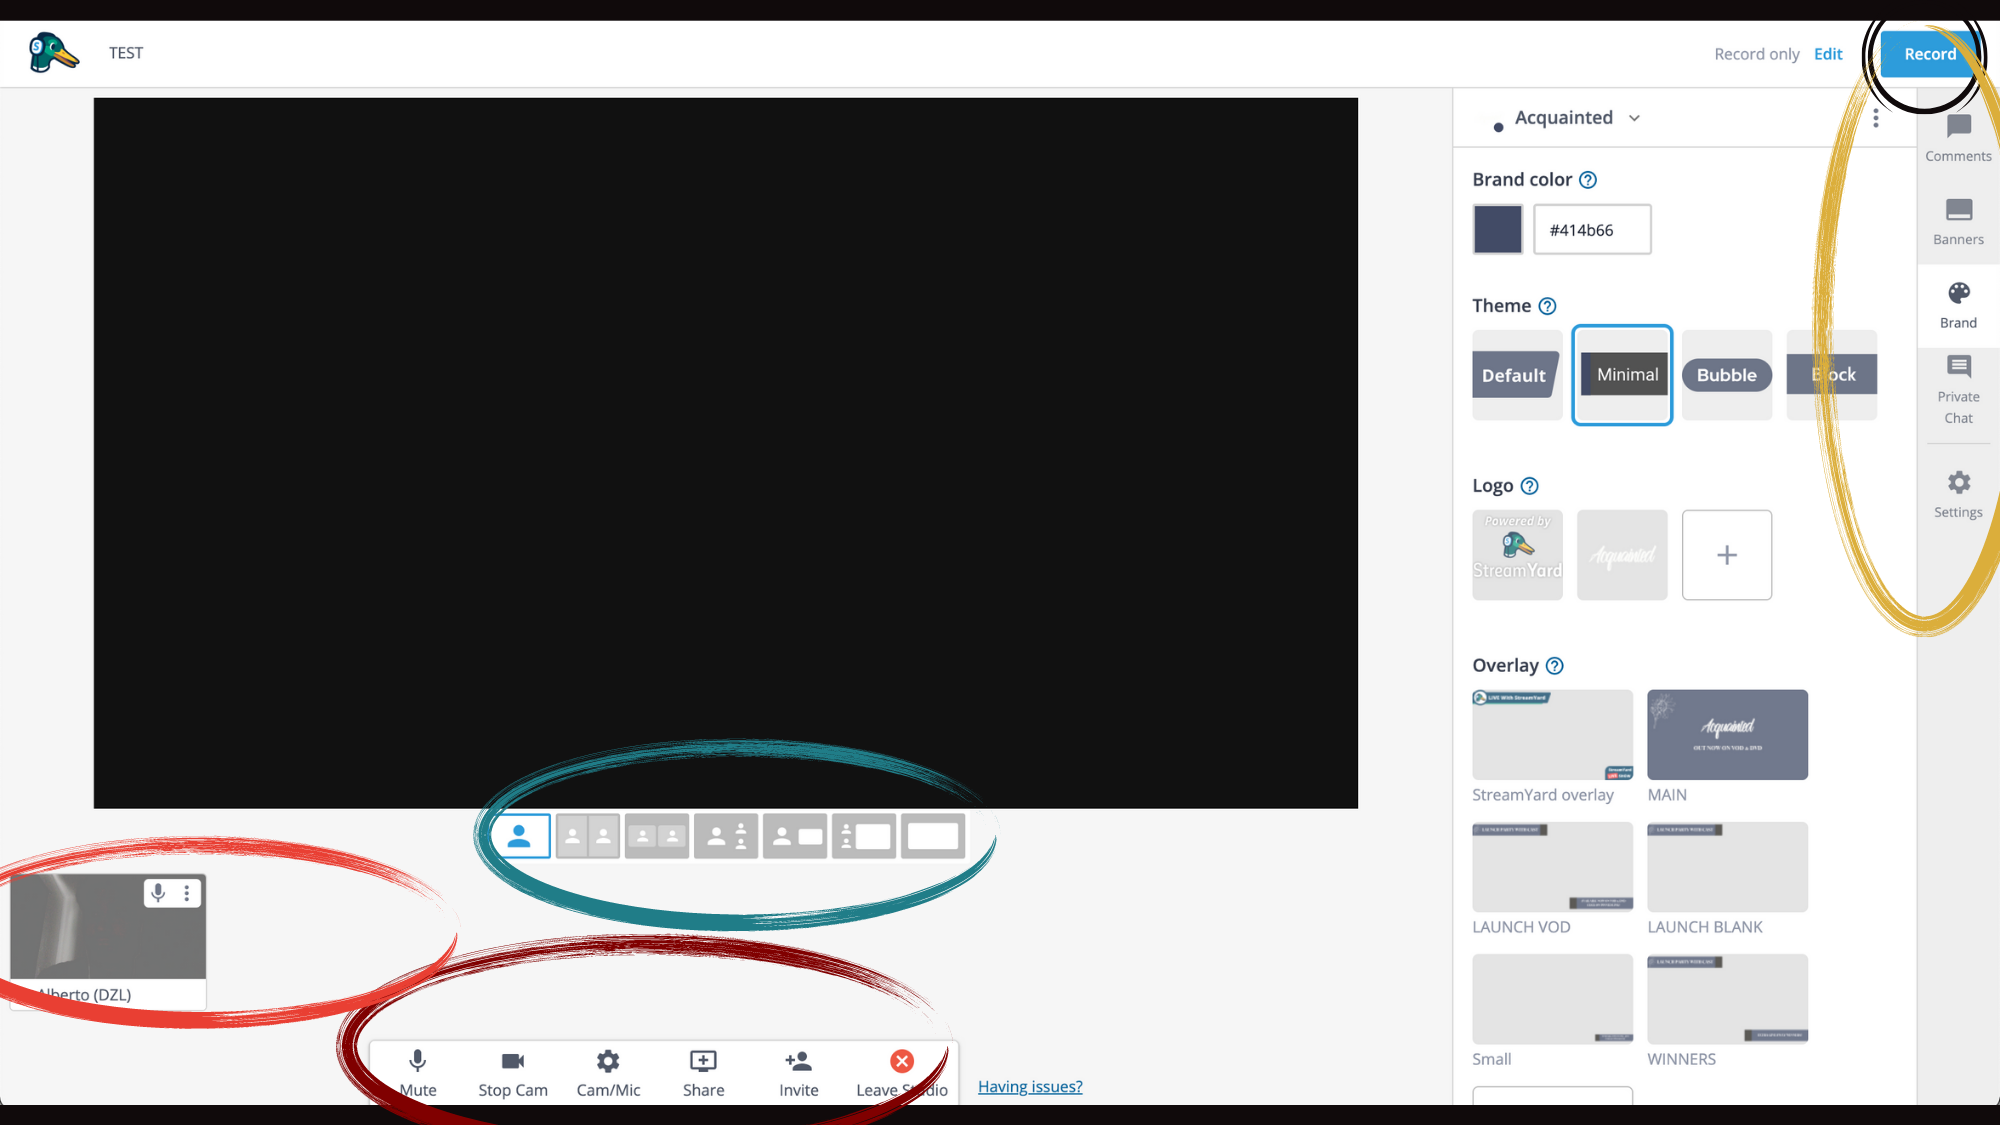
4. WHAT TO KNOW ABOUT THE BROADCAST STUDIO

If you look below, you will find an image that has elements of the studio circled. In the top right corner, there is a menu that brings you to comments during the livestream, branding of the screen, banners, titles, and a private chat of only the attendees on that backend. Most importantly, your record/live button.

Near the bottom right (the blue circle), there is a set of layout options for how you want your guests arranged live. In the orange area, this is where you will be able to manage all your guests, i.e.; add, mute, or kick them.

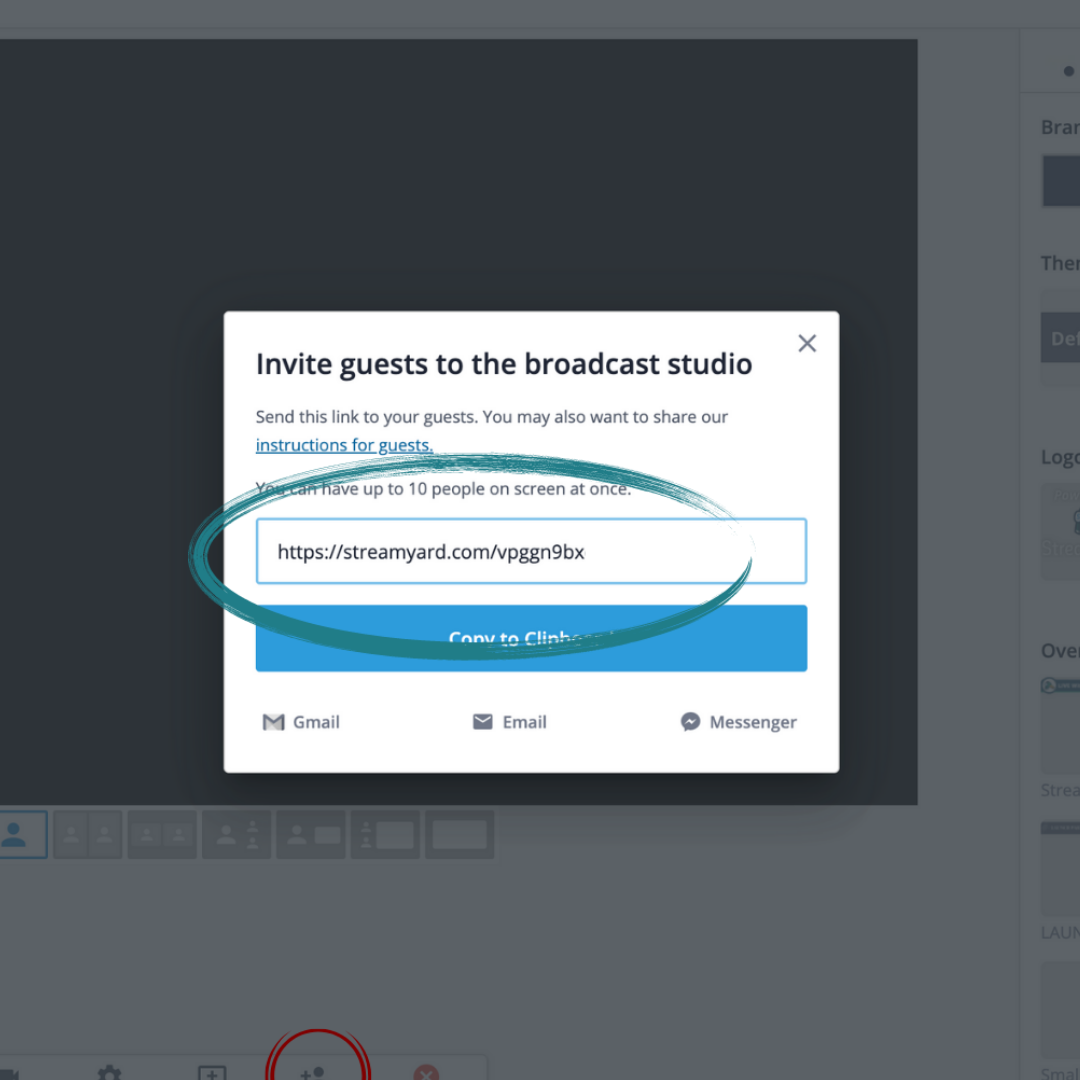
Lastly, if you see the red circle, there is a toolbar that includes your controls and the second most important button… the invite button.

Studio.png

5. INVITE BUTTON AND LINK

When building out your first livestream, you should be very clear on how you can access it on both the backend and front-end. It is an essential step in your live event process. If this is not streamlined, you will run into issues like guests' inability to join, unwanted people joining, confusion, and frustration... not an ideal situation minutes before your stream. 

This link shown below is vital. Make sure you save the link and that it is identical everywhere you share it. 

 
DZL Algorithm Insta.png
 

6. CREATE A GUIDE FOR EVERYONE

It is best to create a guide for your guests and co-workers to follow. Our guide template provides instructions on entering the stream's back-end, including the call time, link, and basic etiquette for the event. Before launching an event, allow 30 minutes before for any troubleshooting needs.

 
LIve_Mock+Up+DZL.jpg
 

7. GO LIVE!

Once everyone is settled and all of your guests are online, go ahead and go live! Now that you’re live, make sure that you’re monitoring everyone’s A/V, internet connection, spam comments, and unwanted guests. From here on out, you are now part of the livestream events community! Welcome!

Previous
Previous

How To Get Acquainted With Hosting A Livestream Event

Next
Next

Pinterest Tips You Need To Know in 2021